


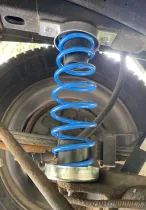
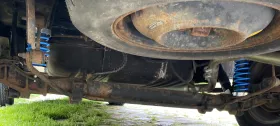
I recently installed the MAD 40-HV-503060 in my 1993 Voyager ES FWD. I bought them for 250 EUR + 6 Shipping from KS Tuning. Strangely enough, the price went up later that day to 275, so it's worth shopping around. I plan to install an LPG system soon, and I'll also be hauling some things around - so the idea is better handling under heavier load.
Wolfram recommended these, and also a great installation tip! https://wiki.classic-voyager.de/es/aftermarket…tz-federn_-_mad
Tools Needed:
Measuring Stick, Marker, Center Punch
13mm Socket wrench, 13mm/adjustable wrench (I'm assuming here, I didn't have a 13mm at the time, 12 was too small, 14 was enough to turn and also get the head stuck)
9mm Drill Bit (for metal)
M8 Tap
Prep:
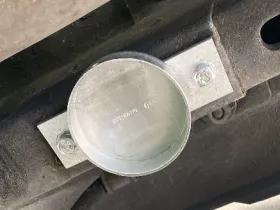
Drill out the bottom "cup" with a 9mm bit - the hole provided is very sloppy and the bolt barely fit in
Buy 2 extra M8 bolts and lock washers - the instructions advise you to re-use the original bolts, which may not be in great shape
The install is really straight forward (printed instructions provided in Dutch, English, German, French and Spanish):
1. Lift the car off the ground (high enough to fit the drill under the axle) - Can be a slight challenge, be safe!
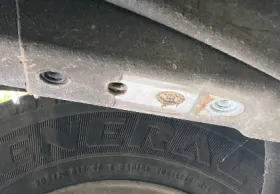
2. Remove the bumpstop - there are two threaded bolt holes, the bumpstop only uses 1, the other should be cleaned with an M8 tap, as it has ~30 years worth of road crud in it! Thanks to Wolfram for the tip, which I hopefully ignored at first and then spend 40 minutes digging in my father-in-law's workshop for the tap - I couldn't get the bolt in for love nor money before cleaning.
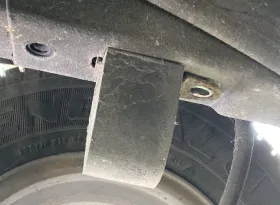
3. Install top bracket where bumpstop was
4. Measure, mark, punch and drill a 9mm hole in the axle as per provided instructions (probably helps to clean off the area first). Be careful around the break lines!
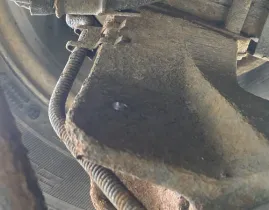
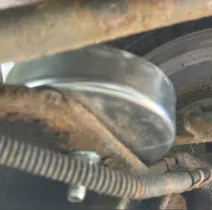
5. Install the bottom bracket using a socket wrench on top and a 13mm or adjustable wrench on the bottom (Lock nuts and washers provided)(Apologies for the blurry picture)
6. Put the rubbers in the springs and then fit them into place. I found it easiest to put the bottom in first, then pull down on the top and slide into place
The instructions also mention adjusting the Loadsensing Apportional Valve after installation, but my understanding is that this isn't needed with ABS.
That's all! With a nice car lift and all the tools at hand, I'd say you could install these in 20 minutes. It took me almost 2 hours, but most of that was spend hunting for bolts and a tap - the second spring took 5 minutes.