Hallo!
Wo ist der Spender? Ich habe ein bisschen interesse in Beifahrer/fahrersitz und ein paar teilen, wann es ist nicht so veit von mir :]
Beiträge von Buataisi
-
-
Wow, super hell!
-
Willkommen im forum! Sehr schönes Auto :]
-Brian
-

Hallo Meister Wolfram

nach langer Zeit kann ich mich mal wieder melden und dir mitteilen, dass ich bei deinem vorschlag Sitbezug demontieren noch nicht weiter gekommen bin und dein Tip >>> da würde ich mal im 1995er Service Manual AS/ES schauen. Wiki: https://wiki.classic-voyager.de/dokumente/handbuecher/start So Sitze finden sich immer in Kapitel 23 der Manuals, im 1995er ist Ab Kapitel 23 - Blatt 8 beschrieben wie man so Sitze zerlegt.
Ich komme scheinbar dort nicht heran wegen forbidden, oder an was es auch immer liegen mag.
Liebe Grüße
Hallo!
Normalerweise erhalte ich diese Fehlermeldung, wenn ich nicht angemeldet bin : ]
-B -
Moin!
Ich denke, ein häufiges Problem besteht darin, dass es sich mit Ruß verkrustet (es sollte sich etwas bewegen, wenn die Drehzahl steigt) oder dass die Vakuumröhre kaputt geht.
Aber ich bin kein expert :]
-
-
Werkstatthandbücher - <jahr> - Cooling System (7-1) - Service Procedures - Water Pumps (7-10)
(Die nummern können von Jahr zu Jahr unterschiedlich sein)
Da steht alles schritt pro schritt. Ich habe neue wasserpumpe nicht gemacht, aber der bibel ist super.
Wäre super, wenn man einen Hinweis bekommt, wonach man genau suchen bzw achten muss. Das ist sonst wie "Ja hier, da ist die Bibel, irgendwo steht was vom Jacob, musst halt gucken bei Tausenden Seiten"
So ein Verweis auf etliche Handbücher und Manuals ist immer, sorry, aber mega hingeschissen. Da kommt dein "Viel Glück" derbe, mehr als derbe zurecht. -
Hallo Herr Tiger!
Hier findet man alles: https://wiki.classic-voyager.de/dokumente/handbuecher/start: D
viel glück!
-
Gut zu wissen, danke!
-
Hallo, mein Einkaufstipp: Kauf den von mir! Für €10 kann ich einen an Dich schicken - oder wir können uns irgendwann treffen (Sommertreffen kommt bald)
: ] PM bitte -
Ich habe das gleiche gekauft aber noch nicht installiert : [
-
3. Classic-Voyager Sommertreffen (2022)
12-14.8.2022
Liebe Voyager-Fans,
findet dieses Jahr auch ein Voyager-Sommertreffen statt.
Wo: Palumpaland | https://palumpa-land.de | Am Stausee 1, 99986 Vogtei / OT Niederdorla
Wann: 12.-14. Aug.
Was: Ein Treffen alter und neuer Freunde
Kosten: ~€20/Nacht https://palumpa-land.de/preise/
Zum internen Thread mit weiteren Daten geht es hier: Klick mich
Liebe Grüße!
-
-
-
Ich habe vom ebay eine "low voltage disconnect" gekauft für 10 euros. Wir werden sehen wie das funktioniert ;D
-

Great post, thank you!
As I don't have many tools for the press yet, I ground down the diameter of the old bearing races and used them to press the new ones in.Toller Beitrag, danke!
Da ich noch nicht viele Werkzeuge zum Einpressen habe, habe ich den Durchmesser der alten Laufringe abgeschliffen und die neuen damit eingepresst.
Mit freundlichen Grüße,
Brian
-
Hallo!
Wir haben kein „D+“ in Lichtmaschine, aber gibt es ein Weg zu simulieren?
MfG
B
-
-
I recently installed the MAD 40-HV-503060 in my 1993 Voyager ES FWD. I bought them for 250 EUR + 6 Shipping from KS Tuning. Strangely enough, the price went up later that day to 275, so it's worth shopping around. I plan to install an LPG system soon, and I'll also be hauling some things around - so the idea is better handling under heavier load.
Wolfram recommended these, and also a great installation tip! https://wiki.classic-voyager.de/es/aftermarket…tz-federn_-_mad
Tools Needed:
Measuring Stick, Marker, Center Punch13mm Socket wrench, 13mm/adjustable wrench (I'm assuming here, I didn't have a 13mm at the time, 12 was too small, 14 was enough to turn and also get the head stuck)
9mm Drill Bit (for metal)
M8 Tap
Prep:
Drill out the bottom "cup" with a 9mm bit - the hole provided is very sloppy and the bolt barely fit in
Buy 2 extra M8 bolts and lock washers - the instructions advise you to re-use the original bolts, which may not be in great shape
The install is really straight forward (printed instructions provided in Dutch, English, German, French and Spanish):
1. Lift the car off the ground (high enough to fit the drill under the axle) - Can be a slight challenge, be safe!
2. Remove the bumpstop - there are two threaded bolt holes, the bumpstop only uses 1, the other should be cleaned with an M8 tap, as it has ~30 years worth of road crud in it! Thanks to Wolfram for the tip, which I hopefully ignored at first and then spend 40 minutes digging in my father-in-law's workshop for the tap - I couldn't get the bolt in for love nor money before cleaning.
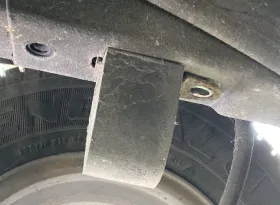
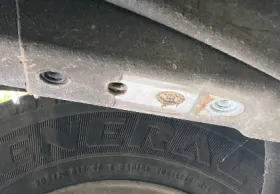
3. Install top bracket where bumpstop was
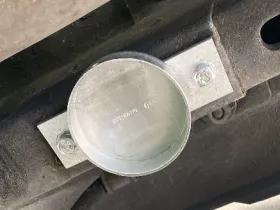
4. Measure, mark, punch and drill a 9mm hole in the axle as per provided instructions (probably helps to clean off the area first). Be careful around the break lines!
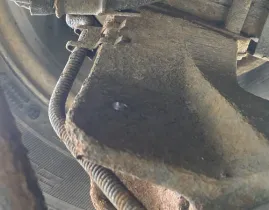
5. Install the bottom bracket using a socket wrench on top and a 13mm or adjustable wrench on the bottom (Lock nuts and washers provided)(Apologies for the blurry picture)
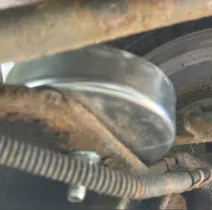
6. Put the rubbers in the springs and then fit them into place. I found it easiest to put the bottom in first, then pull down on the top and slide into place
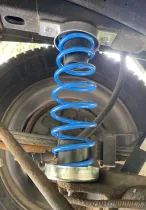
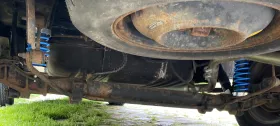
The instructions also mention adjusting the Loadsensing Apportional Valve after installation, but my understanding is that this isn't needed with ABS.
That's all! With a nice car lift and all the tools at hand, I'd say you could install these in 20 minutes. It took me almost 2 hours, but most of that was spend hunting for bolts and a tap - the second spring took 5 minutes. -
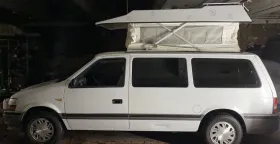
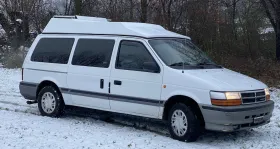
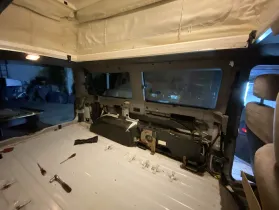
Let me introduce my little Swiss Voyager! I rescued it from Switzerland in January and stripped out what was left of the previous owners semi-camper-conversion. Most of the suspension, breaks, etc were overhauled in the Voyager Klinik, so she's running like a dream! I'm going to turn it into a small camper, and I'm currently working on the electronics (remote central lock, USB/12v ports, leisure battery, etc).